> ## Documentation Index
> Fetch the complete documentation index at: https://wb-21fd5541-typedoc-upgrade.mintlify.site/llms.txt
> Use this file to discover all available pages before exploring further.
# Configure Slack alerts
> Create and configure a Slack application to receive W&B Server alerts, notifications, and monitoring updates.
Integrate W\&B Server with [Slack](https://slack.com/) so that your W\&B instance can dispatch alerts and notifications to a Slack workspace your team already uses. This page walks W\&B Server administrators through creating a Slack application, configuring its OAuth scopes and redirect URL, and registering the application with W\&B.
Watch a [video demonstrating setting up Slack alerts on W\&B Dedicated Cloud deployment](https://www.youtube.com/watch?v=JmvKb-7u-oU) (6 min).
## Create the Slack application
W\&B Server uses a custom Slack application as the bridge for delivering alerts. Follow this procedure to create that application in the Slack workspace where you want to receive notifications.
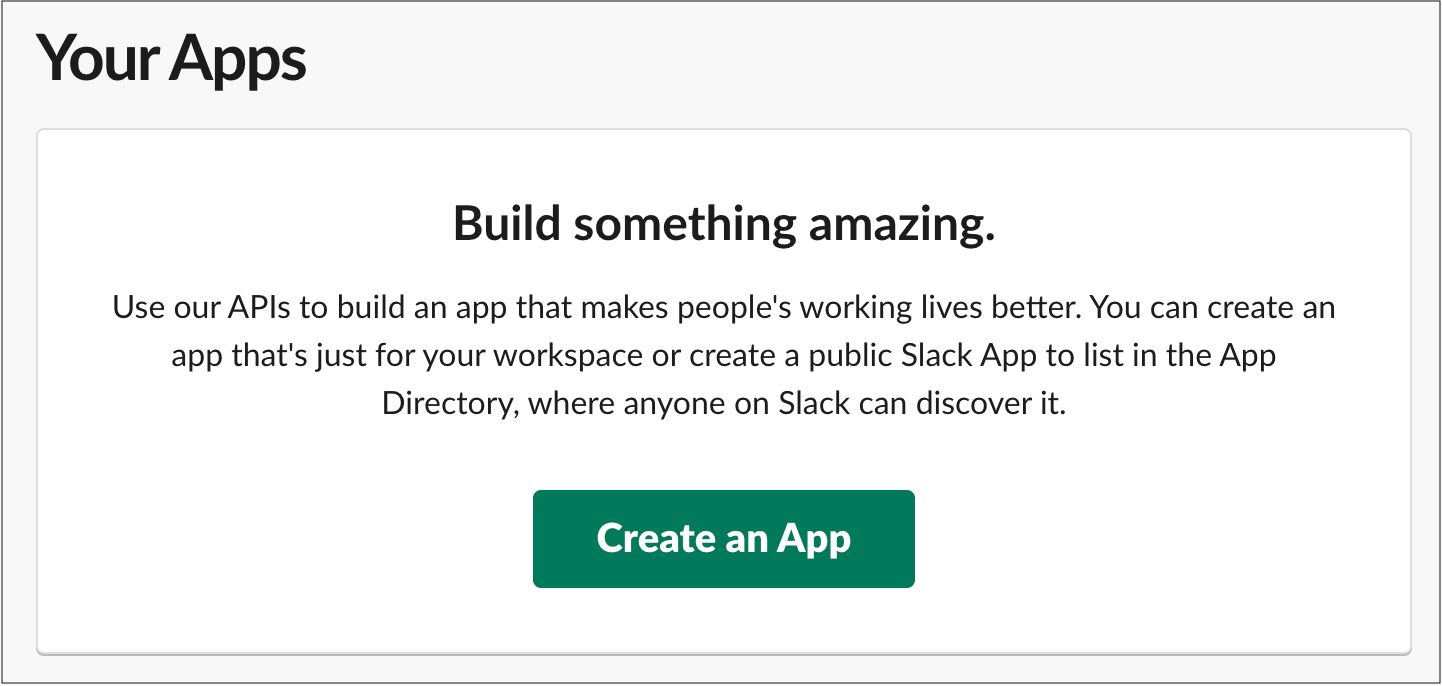
1. Visit [https://api.slack.com/apps](https://api.slack.com/apps) and select **Create an App**.
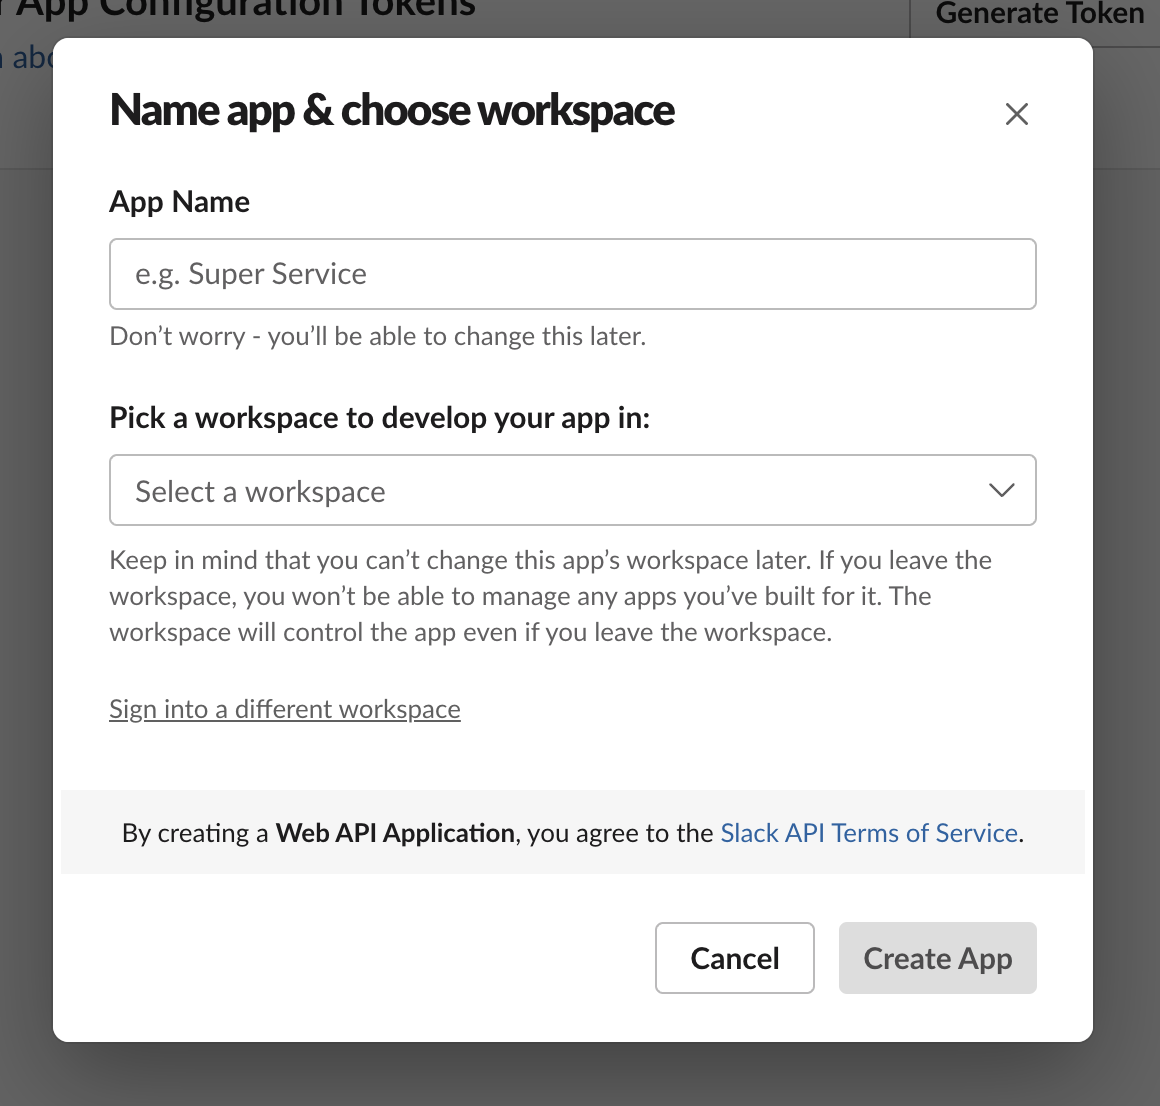
 2. Provide a name for your app in the **App Name** field.
3. Select a Slack workspace where you want to develop your app. Ensure that the Slack workspace you use is the same workspace you intend to use for alerts.
2. Provide a name for your app in the **App Name** field.
3. Select a Slack workspace where you want to develop your app. Ensure that the Slack workspace you use is the same workspace you intend to use for alerts.
 ## Configure the Slack application
After you create the Slack application, grant it the permissions to post messages and accept the redirect from W\&B during the OAuth handshake.
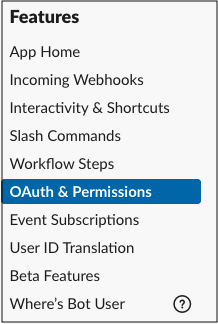
1. On the left sidebar, select **OAuth & Permissions**.
## Configure the Slack application
After you create the Slack application, grant it the permissions to post messages and accept the redirect from W\&B during the OAuth handshake.
1. On the left sidebar, select **OAuth & Permissions**.
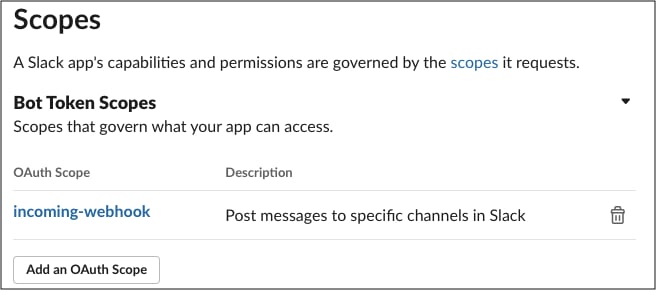
 2. In the **Scopes** section, grant the bot the `incoming_webhook` scope. Scopes give your app permission to perform actions in your development workspace.
For more information about OAuth scopes for bots, see [Understanding OAuth scopes for bots](https://api.slack.com/legacy/oauth-scopes) in the Slack API documentation.
2. In the **Scopes** section, grant the bot the `incoming_webhook` scope. Scopes give your app permission to perform actions in your development workspace.
For more information about OAuth scopes for bots, see [Understanding OAuth scopes for bots](https://api.slack.com/legacy/oauth-scopes) in the Slack API documentation.
 3. Configure the **Redirect URL** to point to your W\&B installation. Use the same URL that you set as your host URL in your local system settings. You can specify multiple URLs if you have different DNS mappings to your instance.
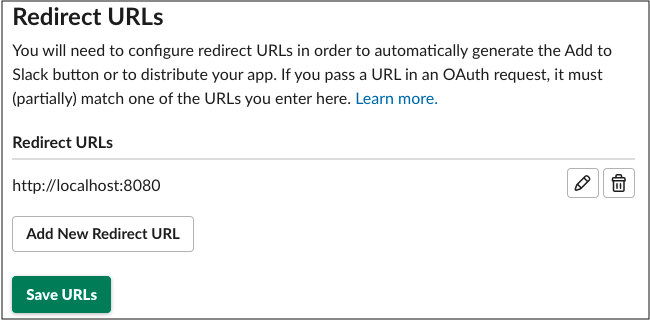 4. Select **Save URLs**.
5. Optional: Under **Restrict API Token Usage**, specify an IP or IP range to allowlist for your W\&B instances. Limiting the allowed IP address helps secure your Slack application.
## Register your Slack application with W\&B
Register the Slack application you configured with your W\&B instance so that W\&B can use it to dispatch alerts.
1. Navigate to the **System Settings** or **System Console** page of your W\&B instance, depending on your deployment.
2. Depending on the System page you're on, follow one of the following options:
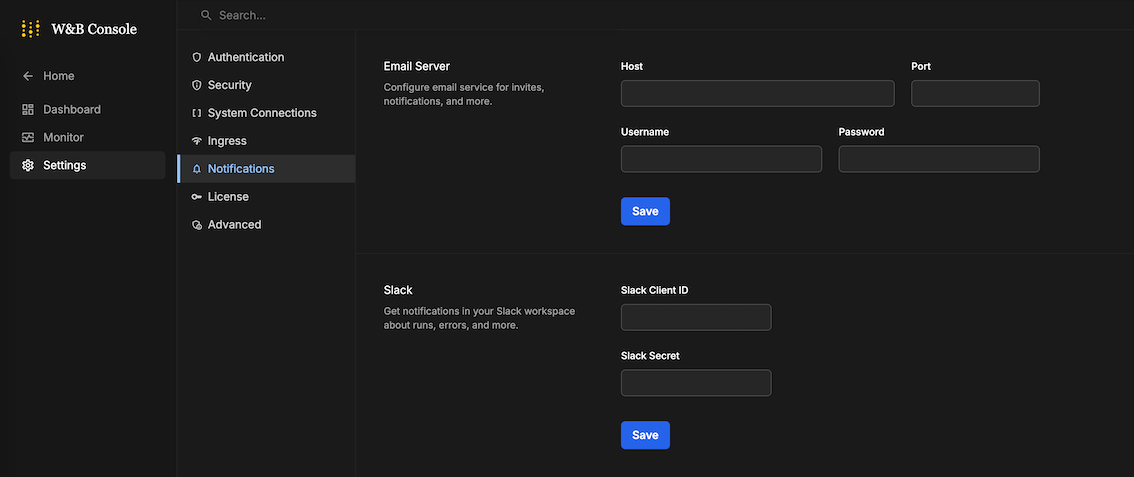
* If you're in the **System Console**: go to **Settings** then to **Notifications**.
4. Select **Save URLs**.
5. Optional: Under **Restrict API Token Usage**, specify an IP or IP range to allowlist for your W\&B instances. Limiting the allowed IP address helps secure your Slack application.
## Register your Slack application with W\&B
Register the Slack application you configured with your W\&B instance so that W\&B can use it to dispatch alerts.
1. Navigate to the **System Settings** or **System Console** page of your W\&B instance, depending on your deployment.
2. Depending on the System page you're on, follow one of the following options:
* If you're in the **System Console**: go to **Settings** then to **Notifications**.
 * If you're in the **System Settings**: toggle the **Enable a custom Slack application to dispatch alerts** to enable a custom Slack application.
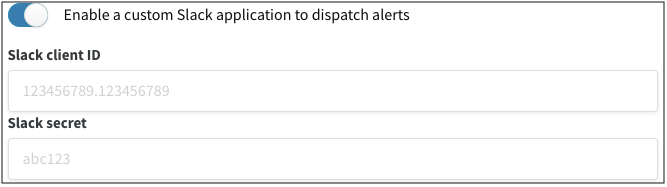 3. Supply your **Slack client ID** and **Slack secret**, then select **Save**. To find your application's client ID and secret, navigate to **Basic Information** in **Settings**.
4. To verify that everything works, set up a Slack integration in the W\&B app.
Your W\&B Server is now registered with the Slack application and can dispatch alerts to the configured Slack workspace.
3. Supply your **Slack client ID** and **Slack secret**, then select **Save**. To find your application's client ID and secret, navigate to **Basic Information** in **Settings**.
4. To verify that everything works, set up a Slack integration in the W\&B app.
Your W\&B Server is now registered with the Slack application and can dispatch alerts to the configured Slack workspace.